티스토리 뷰
8-1. 반응 선택자 - hover
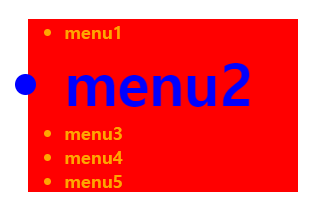
hover는 마우스를 특정 태그 위에 올렸을 때 반응하는 속성을 설정해준다.
li:hover { 속성 } 과 같이 사용한다.
<!DOCTYPE html>
<html lang="en">
<head>
    <meta charset="UTF-8">
    <title>Title</title>
    <style>
      div {
        width:300px; background-color:red;
        margin:30px 0 0 30px;
      }

      ul > li {
        font-size:20px;
        font-weight:bold;
        color:orange;
      }

      li:hover {
        color:blue;
        font-size: 4em;
      }
    </style>
</head>
<body>
  <div>
    <ul>
      <li>menu1</li>
      <li>menu2</li>
      <li>menu3</li>
      <li>menu4</li>
      <li>menu5</li>
    </ul>
  </div>
</body>
</html>

+α 로 알아가기 : margin 사용법
style 태그 안의 div에 주는 CSS 속성에서 margin: 30px 0 0 30px에 주목해보자.
여백을 위에는 30px, 오른쪽에는 0px, 아래에는 0px, 왼쪽에는 30px 준다는 의미이다.
위부터 시계방향으로 회전하여 위, 오른쪽, 아래, 왼쪽 순서로 명시해주면 된다.
margin: 30px 20px 10px 의 경우에는
여백을 위에는 30px, 오른쪽에는 20px, 아래에는 10px, 왼쪽에는 20px 준다는 의미이다.
오른쪽과 왼쪽에 같은 값을 줄 때는 왼쪽 값을 생략해준다.
margin: 30px 10px 의 경우에는
여백을 위, 아래에는 30px, 오른쪽, 왼쪽에는 10px 준다는 의미이다.
위, 아래가 같을 시 아래를 생략해주고 오른쪽, 왼쪽이 같을 시 마찬가지로 왼쪽을 생략해준다.
margin: 30px 의 경우에는
여백을 위, 오른쪽, 아래, 왼쪽 모두 동일하게 30px을 준다는 의미이다.
8-2. 상태 선택자
focus, enabled, disabled 와 같이 선택자의 상태를 나타내준다.
focus : 선택이 된 경우
enabled : 변경 가능
disabled : 변경 불가능
<!DOCTYPE html>
<html lang="en">
<head>
    <meta charset="UTF-8">
    <title>Title</title>

    <style>
      input:focus {
        border:2px solid #ff0000;
        padding:10px;
      }

      input:enabled {
        color:#00ff00;
        font-weight:bold;
      }

      input:disabled {
        color:#ff0000;
      }
    </style>
</head>
<body>
  <div>
    <form>
      이름 : <input type="text" name="uname" /> <br />
      아이디 : <input type="text" name="uid" /> <br />
      비밀번호 : <input type="password" name="upw" value="12345" disabled="disabled" /> <br />
    </form>
  </div>
</body>
</html>

input:focus 에 준 CSS 속성대로
위 사진에서 아이디에 해당하는 input창에 border 속성과 padding 속성이 들어가 있는 것을 볼 수 있다.
또한, input:disabled 에 준 CSS 속성대로
비밀번호에 해당하는 input창은 변경이 불가능하고, value값인 "12345"가 password type 형태로 ••••• 와 같이 들어가있다.
disabled="disabled" 속성이 없는 input 태그는 모두 input:enabled 의 CSS 속성을 적용받게 되고
위 사진에서 보듯이 연두색 글자에 bold 처리가 되어있다.
8-3. 구조 선택자
class나 id를 속성으로 가지고 있지 않은 같은 종류의 태그들을 선택할 때 사용한다.
HTML파일을 직접 처음부터 만들 때는 보통 id와 class를 태그의 속성으로 주어 구분하기 쉽게 해준다.
하지만 크롤링을 할 때처럼 특수한 경우에는 이미 만들어진 HTML파일을 이용해야 한다.
이럴 때 태그의 종류는 같지만 이들을 단순한 속성들로 구분할 수 없는데 이 때 구조 선택자를 이용해준다.
nth-child(2n+1) : n은 0부터 시작하고, 홀수번째만 선택(짝수는 괄호 안에 2n을 넣어준다.)
first-child, last-child : 처음과 마지막(first-of-type, last-of-type으로도 가능)
<!DOCTYPE html>
<html lang="en">
<head>
    <meta charset="UTF-8">
    <title>Title</title>

    <style>
      * { margin:0; padding:0; }

      div { width:500px; }

      ul li:nth-child(2n+1) { background-color:red; }
      ul li:nth-child(2n) { background-color:yellow; }

      ul li:first-child { border-radius:10px 10px 0 0; }
      ul li:last-child { border-radius: 0 0 10px 10px; }
    </style>
</head>
<body>
  <div>
    <ul>
      <li>menu1</li>
      <li>menu2</li>
      <li>menu3</li>
      <li>menu4</li>
      <li>menu5</li>
    </ul>
  </div>
</body>
</html>

홀수번째 li 태그는 빨간색으로, 짝수번째 li 태그는 노란색으로 설정이 된다.
+α 로 알아가기 : border-radius
border-radius는 테두리를 둥글게 만드는 속성이다.
border-radius: n n n n(좌상단, 우상단, 우하단, 좌하단) 과 같은 순서로 명시해준다.
좌상단에서 시작해서 시계 방향으로 간다고 보면 된다.
네 곳 모두 입력해주지 않고 몇 곳만 명시해주는 규칙은 위의 margin 사용법에서 본 것과 유사하다.
border-radius: 30px 0 의 경우는 좌상단, 우하단이 30px, 우상단, 좌하단이 0이다.
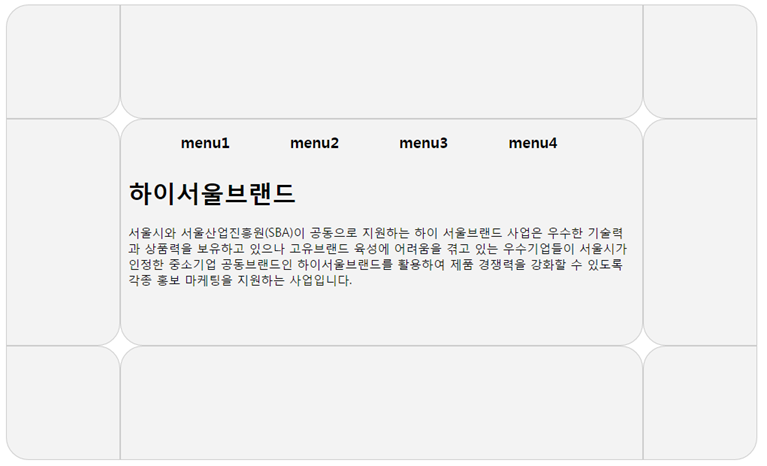
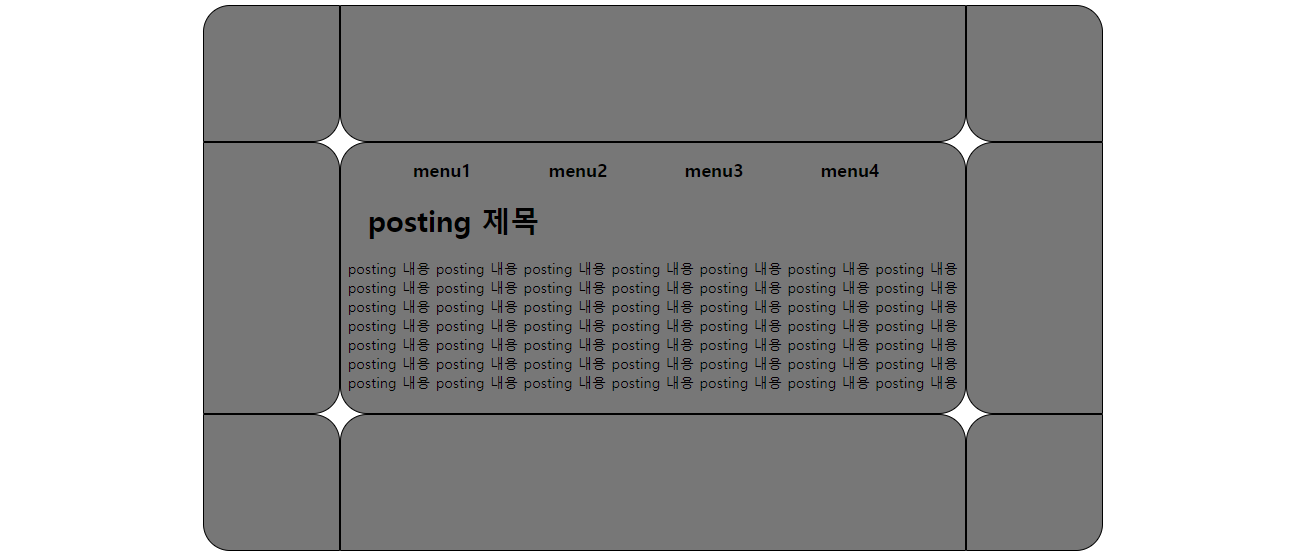
8-4. 전체적인 레이아웃 설정
지금까지 배운 것들을 총동원하여 예제를 풀어보았다.

<!doctype html>
<html lang="en">
<head>
  <meta charset="UTF-8">
  <meta name="viewport"
        content="width=device-width, user-scalable=no, initial-scale=1.0, maximum-scale=1.0, minimum-scale=1.0">
  <meta http-equiv="X-UA-Compatible" content="ie=edge">
  <title>Document</title>
</head>
<style>
  #header, #content, #footer {
    width: 1000px;
    margin: 0 auto;
    overflow: hidden;
  }

  #header .left_space, #content .left_space, #footer .left_space {
    height: 150px;
    width: 150px;
    background-color: #777777;
    float: left;
    border: 1px solid black;
  }

  #header .center_space, #content .center_space, #footer .center_space {
    height: 150px;
    width: 694px;
    background-color: #777777;
    float: left;
    border: 1px solid black;
  }

  #header .right_space, #content .right_space, #footer .right_space {
    height: 150px;
    width: 150px;
    background-color: #777777;
    float: right;
    border: 1px solid black;
  }

  #header .left_space, #footer .right_space {
    border-radius: 30px 0;
  }

  #header .right_space, #footer .left_space {
    border-radius: 0 30px;
  }

  #content .left_space {
    border-radius: 0 30px 30px 0;
    height: 300px;
  }

  #content .right_space {
    border-radius: 30px 0 0 30px;
    height: 300px;
  }

  #header .center_space {
    border-radius: 0 0 30px 30px;
  }

  #content .center_space {
    border-radius: 30px;
    height: 300px;
  }

  #footer .center_space {
    border-radius: 30px 30px 0 0;
  }

  #content .center_space ul li {
    list-style: none;
    display: inline;
    padding: 0 40px;
    font-weight: bold;
    font-size: 20px;
  }

  #content .center_space h1 {
    padding-left: 30px;
  }

  #content .center_space p {
    text-align: center;
  }
</style>
<body>
<div id="header">
  <div class="left_space"></div>
  <div class="center_space"></div>
  <div class="right_space"></div>
</div>
<div id="content">
  <div class="left_space"></div>
  <div class="center_space">
    <div>
      <ul>
        <li>menu1</li>
        <li>menu2</li>
        <li>menu3</li>
        <li>menu4</li>
        <br />
      </ul>
    </div>
    <div class="posting">
      <h1>posting 제목</h1>
      <p>posting 내용 posting 내용 posting 내용 posting 내용 posting 내용 posting 내용 posting 내용 posting 내용 posting 내용 posting 내용 posting 내용 posting 내용 posting 내용 posting 내용 posting 내용 posting 내용 posting 내용 posting 내용 posting 내용 posting 내용 posting 내용 posting 내용 posting 내용 posting 내용 posting 내용 posting 내용 posting 내용 posting 내용 posting 내용 posting 내용 posting 내용 posting 내용 posting 내용 posting 내용 posting 내용 posting 내용 posting 내용 posting 내용 posting 내용 posting 내용 posting 내용 posting 내용 posting 내용 posting 내용 posting 내용 posting 내용 posting 내용 posting 내용 posting 내용</p>
    </div>
  </div>
  <div class="right_space"></div>
</div>
<div id="footer">
  <div class="left_space"></div>
  <div class="center_space"></div>
  <div class="right_space"></div>
</div>
</body>
</html>

출처
https://www.inflearn.com/course/html-css-%EA%B0%95%EC%A2%8C#
인프런 실전 HTML & CSS 강좌
'Web > HTML & CSS' 카테고리의 다른 글
| 10강 : CSS 속성1 (0) | 2020.02.29 |
|---|---|
| 9강 : CSS 기본4 (0) | 2020.02.29 |
| 7강 : CSS 기본2 (0) | 2020.02.28 |
| 6강 : CSS 기본1 (0) | 2020.02.28 |
| 5강 : HTML 기본4 (0) | 2020.02.28 |
- Total
- Today
- Yesterday
- springboot
- Java
- BOJ
- 1급객체
- CSS
- 플로이드워셜
- 최소공통조상
- 인프런
- javascript
- 알고리즘
- heapq
- 최소스패닝트리
- webpack
- python
- 백준
- 다익스트라
- 투포인터
- 고차함수
- 웹팩
- 파이썬
- html
- MST
- SCSS
- 에라토스테네스의체
- 위상정렬
- 자바스크립트
- js
- controller
- frontend
- BFS
| 일 | 월 | 화 | 수 | 목 | 금 | 토 |
|---|---|---|---|---|---|---|
| 1 | 2 | 3 | 4 | 5 | 6 | 7 |
| 8 | 9 | 10 | 11 | 12 | 13 | 14 |
| 15 | 16 | 17 | 18 | 19 | 20 | 21 |
| 22 | 23 | 24 | 25 | 26 | 27 | 28 |
